Coral Level Run Through. Going through the rocky cliffs, the fissure, and the coral maze.

Player spawn of the level. This is the rocky cliffs. Edge rock overlooking water with dark pocked rocks scattered about. This is how this fantasy environment may have looked in its most natural state.

Rocky cliffs.

Rocky cliffs.

This is the Fissure area. Traversal area is tighter with more jagged rocks scattered about. This area may have been affected by magical battles or geo plate activity.

The Fissure.

Coral Maze area. This area has been affected by geo plate movement as well as magical experiments. The result is an eerie yet whimsical environment with giant coral elements.

Coral Maze.

Coral Maze.
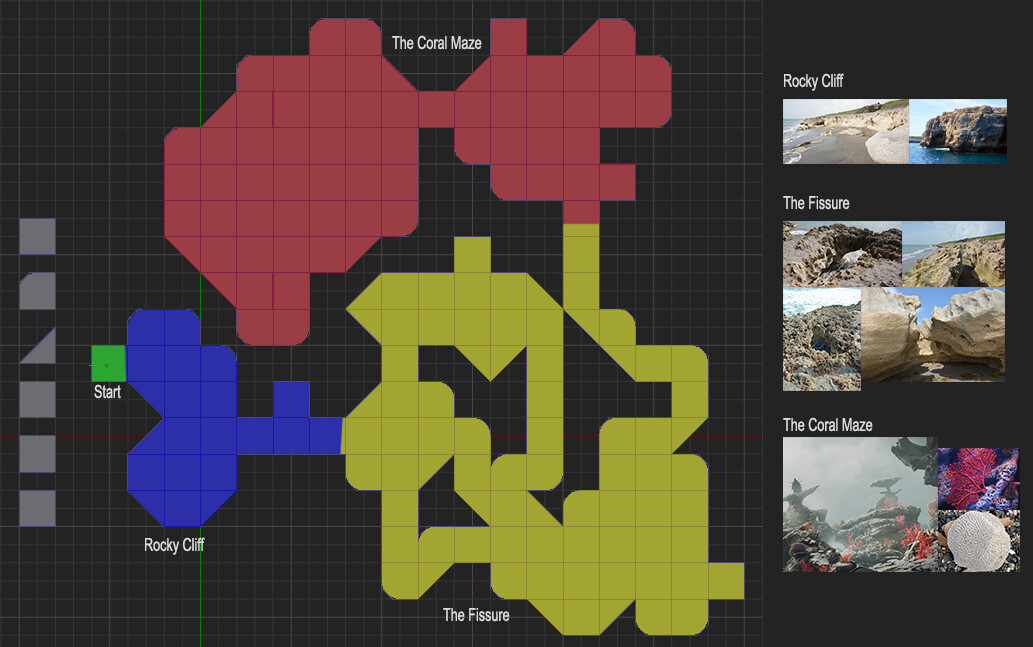
Top down level design map and motif layout.

Level design tile kit pieces. Because I knew I would be using a triplanar worldspace vertex shader I used as few kit pieces as possible. Because I could rotate these and make a level without worrying about lining up UVs or seams.

For my rock and coral props I focused on just making general organic shapes that could be kit bashed in Unreal. I knew I would rely on the vertex shader so I didn't worry about UVs or 0-1 asset sculpts.

Tile kit graybox layout.
4 Layer Vertex Tesselation Displacement Worldplace Triplanar Shader. This video showcases the main shader I used to create this level/environment.

Master Vertex Shader template. This isthe 4 layer vertex shader.

Break down of vertex shader at a single channel level. This is basically done 4 times over.

Vertex Shader parameters.

A majority of my materials were modified or based off earlier Substance Designer studies. Outside the small twig and bush asset everything utilized the triplanar worldplace v ertex shader so I was just painting in various materials in Unreal.

Top down of the level.

Props. These could be kit bashed and painted differently to get multiple novel uses out of them.
I wanted practice building out an environment from more of a level design perspective rather than just making an environment. So I went with a coastal beach type environment with some fantastical coral elements as the final area. Started with reference gathering, graybox level design, and dividing the level up by various themes based on my materials and props.
Went with a 4 layer vertex shader to do most of the heavy lifting on the environment art. Being a vertex displacement world-space triplanar paint shader. This way I could use a smaller level design kit and use various model shapes and let my materials do the rest of the work. Outside lightmaps I didnt have to worry about UVing, seams, or sculpting assets. This made level iteration and world building very fast and efficient.
I did end up using free Unreal Market Place Paragon character and a free water material template.
For detailed WIP look at my blog posts as I worked on this project:
https://www.artstation.com/ryandao/blog


